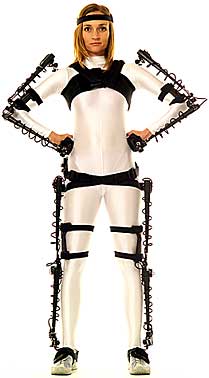
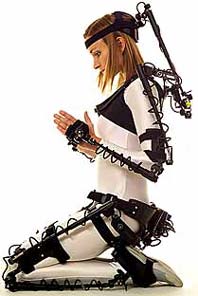
Motion Capture Suits
Gypsy Motion Capture System Workflow
 Workflow
1. Putting on the suit (approximately 3 minutes)
2. New performer calibration (approx. 10 minutes)
This step is skipped if a calibration file already exists for the performer.
3. Initialization pose (instantaneous)
For post production:
4. Use one of the following processes:
Record skeletal motions in BVH format using the stand-alone driver or
Record motion using a custom driver you have written using the Gypsy SDK.
Use a performance type motion capture software such as Autodesk MotionBuilder to record motion on skeleton, edit as desired, then export to your 3D animation software of choice or
 Use a performance type motion capture software such as MotionBuilder to record motion on your actual character, edit as desired, then export the character's animation in a format that can be directly imported in your 3D animation software of choice.
5. Edit and render the animation in your 3D animation software.
For Performance animation:
4. Use a performance type motion capture software such as MotionBuilder to display your motion on your character in real-time, along with other characters and environments as desired.
5. Use an NTSC or PAL adapter to convert the computer's RGB output to a signal suitable for broadcast. If desired, character(s) can be displayed against a solid color background so they can be separated from their background by the chroma-key process for inclusion in a real or virtual studio environment.